 | Our imported Scotsman is looking good, but is lacking the effects,
such as smoke and steam, of the real Scotsman.
In this tutorial we will add a smoke effect to the Scotsman we
imported in the previous tutorial.
|
|
|
| To add an effect to a train simulator model, we have to indicate
where the effect originates and the size of the effect.
|
|
|
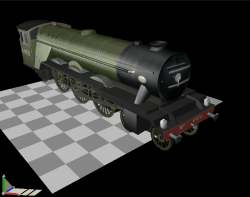
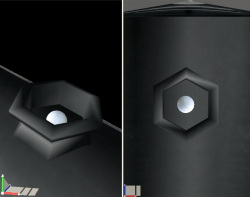
| This is done by adding a placeholder shape to the model. This
placeholder indicates the location and size of the effect. In this
example we have dropped a sphere on our model as our smoke source.
There is nothing special about this sphere. It is just a primitive. It
does not need to be textured like the other shapes in our scene since
it will not actually be exported with the model. |
|
|
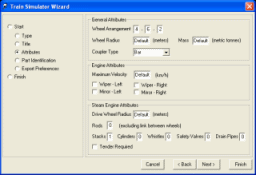
| Once you have added the placeholder for the smoke effect, run the
Train Simulator Wizard. Click the Next button until you get to
the Attributes section. Change the value of the Stacks field to
1 to indicate that there is one stack. Notice you can enter values for
other effects such as the effects from Cylinders, Whistles, Safety
Valves and Drain Pipes. We will restrict ourselves in this tutorial to
the stack.
Click the Next button.
|
|
|
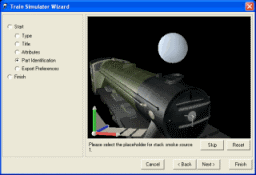
| The wizard now asks you to identify the source of the stack smoke.
Click the shape you added earlier.
Click the Finish button to export your model to Train
Simulator. |
|
|
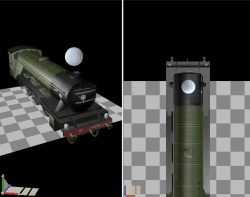
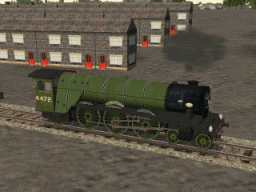
| The smoke effect now appears where the placeholder was and using a
source the size of the placeholder. Obviously this is not a correct
location or size. |
|
|
| The source needs to be smaller and set inside the stack. |
|
|
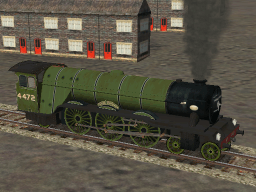
| Here we have our completed effect. |
|
 |